recipe
Venezuelan arepas: griddled white-corn breads
Make simple, thick arepas from precooked corn flour, with US packaging tips, dough troubleshooting and skillet-to-oven finishing.
AI editorial review: 2026-10-22
Researched recipe; not cooked or tested by Culinara.
Jump to ingredients and methodPrint using your browser’s Print command.
Ingredients and method
About 8 medium arepas
Ingredients
- 2 cups white precooked corn flour labeled for arepas (masarepa; not raw cornmeal or masa harina)
- 2 1/4 cups lukewarm water, divided (start with 2 cups and add a spoonful at a time as needed)
- 1 teaspoon fine salt
- 1 tablespoon neutral oil for the skillet
Method
- Heat the oven to 350°F. Line a baking tray with parchment. Dissolve the salt in 2 cups lukewarm water in a wide mixing bowl.
- Sprinkle the precooked corn flour into the water while stirring by hand. Press out dry pockets. Rest 5 minutes for hydration, then knead briefly. Add water by the tablespoon if cracks form, or a spoonful of flour if the dough flows. The aim is soft, moldable dough that holds a clean edge.
- Divide into 8 balls. Pat each into a disc about 3 to 4 inches wide and 1/2 inch thick. Smooth the edges with damp fingertips. Cover the shaped discs while the skillet heats so the surface does not dry.
- Warm a lightly oiled heavy skillet over medium heat. Brown the arepas about 3–5 minutes per side without pressing hard; adjust the heat if spots burn before the middle cooks. Work in batches.
- Move the browned arepas to the oven for roughly 15–20 minutes, until the crust is firm and the centers are cooked through. Split one: there should not be a sticky streak of raw-tasting dough. Allow it to cool briefly before opening.
- Split carefully to make a pocket without cutting through the back. Serve with warm black beans or cooked shredded beef from our other recipes. Refrigerate perishable fillings promptly; leave unfilled arepas covered until ready.
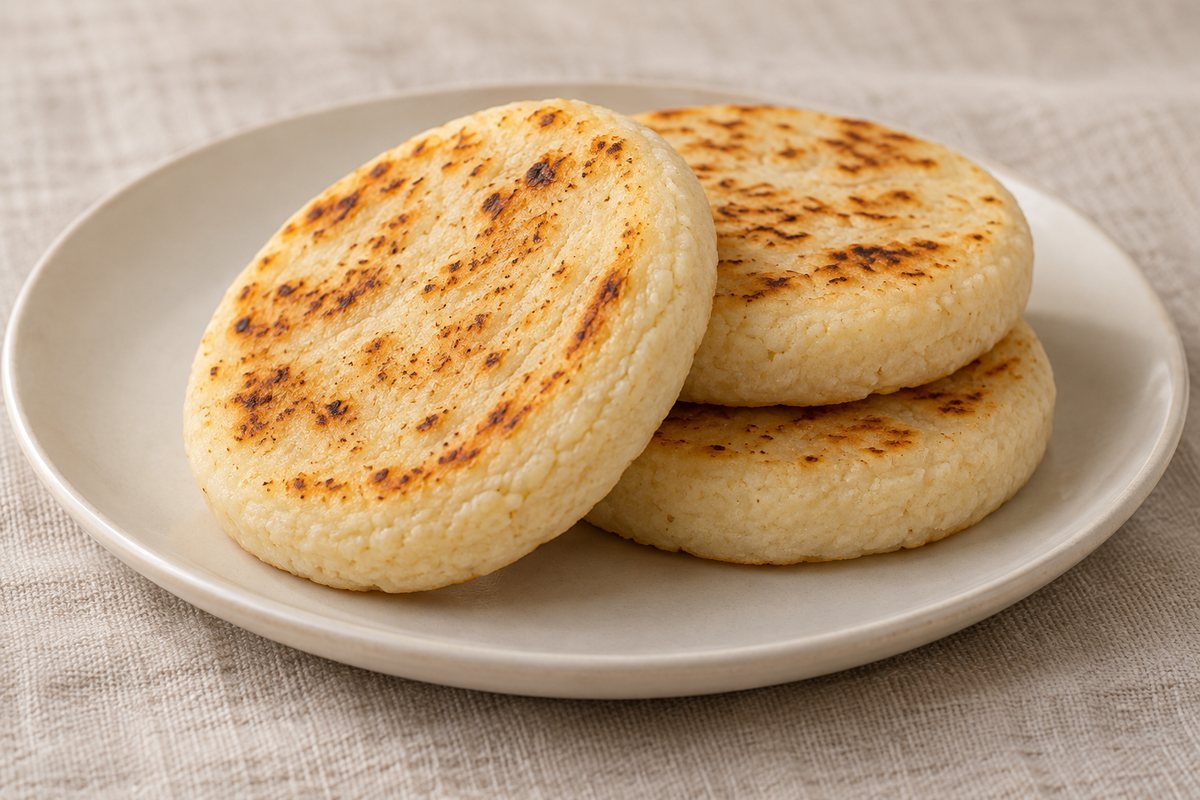
AI-generated illustration: Original AI interpretation of unfilled griddled arepas, with rounded faces and pale corn interiors. Actual browning may vary.
OpenAI · Usage terms
Image details
Uncropped proportional downscale from saved original PNG to 1200px maximum JPEG, quality-optimized.
Start with the right bag
Look for precooked corn flour or masarepa, often sold as Harina P.A.N. or an equivalent white-corn arepa flour. This is not fine raw cornmeal, Mexican nixtamalized masa harina, or a pancake mix. Those require different hydration and handling.
Let your hands judge the dough
The exact water absorption depends on the brand and humidity. A dough that breaks into deep edge cracks is too dry; a flat patty that slumps or sticks heavily is too wet. Give added water a few minutes to absorb before adding more.
Sources: [1]
Brown first, then cook the center
The skillet develops a spotted crust; the moderate oven helps a thick arepa finish internally without burning. A pale, gummy middle needs more cooking, not simply a darker exterior.
Fill after cooking
An arepa can be eaten plain or opened for a filling. The linked caraotas negras and carne mechada recipes make a useful combination; both are separate from the basic dough and must be prepared safely.
Research sources
- YMCA of Greater Seattle — Venezuelan stuffed arepas (checked 2026-10-22)
- University of Virginia International Center — Venezuelan food: Arepas and tequeños (checked 2026-10-22)